

Common Defects in Plastic Injection Molding: Interactive Diagnostic & Troubleshooting Guide [2025]
Published on by MoldMinds Staff | 18 min read
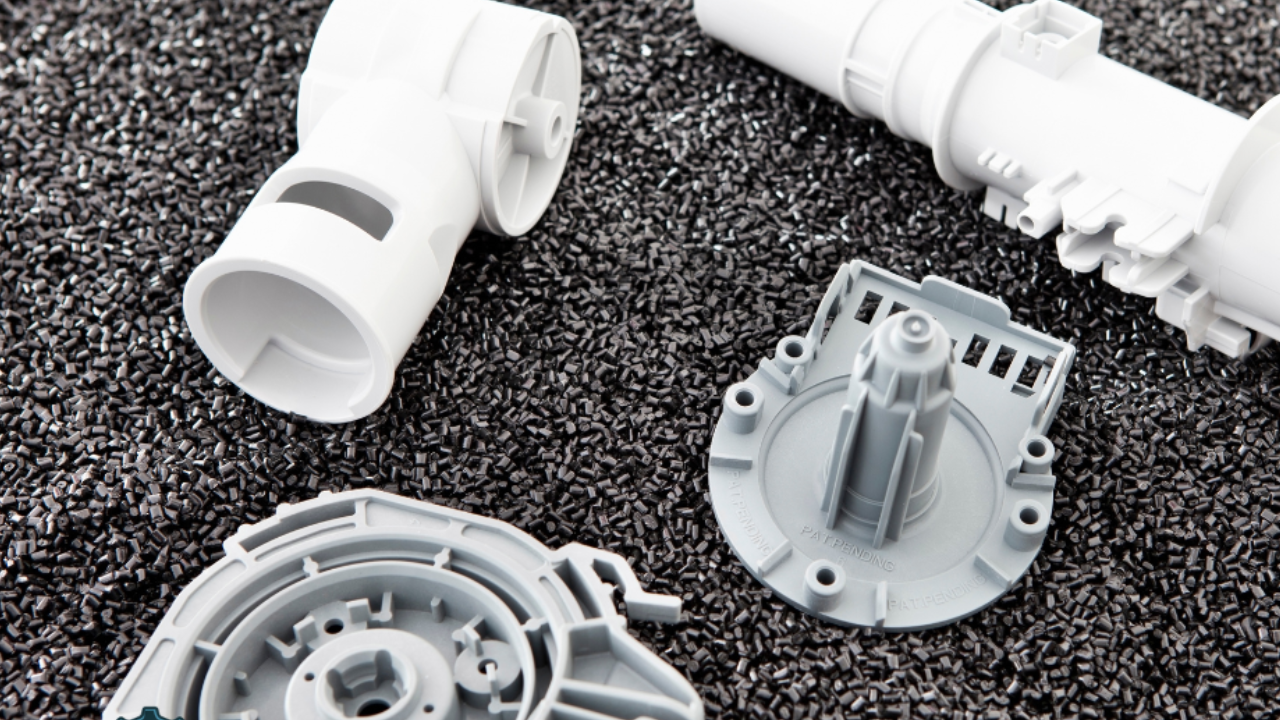
Plastic injection molding shapes the products we use every day, from car parts to various medical products. This process is the backbone of modern manufacturing because it creates precise parts quickly and in amounts most consumers couldn't imagine. But even the best plastic injected molded parts have their fair share of injection molding defects.
The more defects in plastic injection molding, the more time and money is wasted. Not to mention, the rigorous production schedules that become nearly impossible to adhere to when defects are found during the injection molding process.
It's imperative to understand what these defects look like, what causes them, and how to react when they're noticed during in process checks, restarts, start-ups, etc. In this comprehensive guide, I'll not only break down the most common types of defects—I'll give you an interactive diagnostic tool that analyzes your specific situation and provides customized troubleshooting recommendations. Let's get started so you can deliver high-quality parts every cycle.
🔬 Interactive Defect Diagnostic Wizard
Answer a few quick questions and get instant troubleshooting recommendations
What defect are you seeing?
Click on the defect that best matches what you're experiencing
Where does the defect appear?
How often does this defect occur?
What material are you molding?
What's your part geometry like?
What are your current process settings?
Enter approximate values (we'll suggest adjustments)
Diagnostic Analysis Complete
Based on your inputs, here's what's causing your defect:
🎯 Defect Severity Assessment
🔍 Most Likely Root Causes
⚙️ Recommended Parameter Adjustments
✅ Solutions Ranked by Priority
Try these in order from top to bottom
Understanding the Injection Molding Process
Success on your plastic injection molding production floor starts with understanding the full process. Every step, from loading plastic pellets to demolding influences the quality of the final product. Most common defects in plastic injection molding can be traced back to key occurrences such as cycle interruptions, mold preventative maintenance, in press preventative maintenance (or lack thereof). Here, I'll break down the key contributors to most of your injection molded part defects.
The Main Stages of Injection Molding
Moving through the process step by step gives a clear picture of where s*@t hits the fan...especially when on time deliveries are at jeopardy.
-
Material Preparation
It's all in the preparation. Plastic pellets or granules are dried (in some applications) and sometimes blended with colorants or additives. If raw materials have too much moisture, contamination, or are not mixed well, defects are sure to follow. -
Melting and Injection
Next, the pellets are fed into a heated barrel. The screw recovers and uses hydraulic force in some applications to inject them forward while they melt. The molten plastic is then shot under high pressure into a closed mold.- Temperature and pressure during injection set the tone for part quality. Too high or too low, and you risk flow marks, short shots, or burn marks.
- If the screw rotates too fast or too slow, mixing can suffer, causing inconsistent parts.
-
Cooling
Once inside the mold, the plastic needs to cool and solidify before the mold opens.- Cooling time and mold temperature control shrinkage, warping, and sink marks.
- Cool too fast and parts warp. Cool too slowly and cycle times go up, hurting productivity.
-
Mold Opening and Ejection
After cooling, the mold opens and the plastic part is ejected from said mold.- If ejection isn't smooth, you can get scratches, dents, or cracks.
- Any sticking or warping makes removal tough and can damage both the part and the mold.
How Process Variables Affect Part Quality
The injection molding process is sensitive. Small changes in settings can make a big difference in part quality. Here are the key process variables that have the most impact:
-
Melt Temperature:
If the melt is too hot, plastic can degrade or burn. Too cold, and it won't fill the mold completely. -
Injection Speed/Pressure:
Higher injection speeds can help fill thin or complex parts, but too much speed or pressure leads to flashing or burn marks. -
Cooling Rate:
Inconsistent cooling gives you parts with uneven shrinkage, often seen as warping or internal stresses. -
Mold Temperature:
If molds run too cold, you'll see flow lines or poor surface quality. Too hot and you get sticking or longer cycles. -
Material Drying:
Not enough drying leads to bubbles or splay (streaks). Too much drying can overheat the material and change how it flows.
These aren't the only factors, but they're the most common sources of trouble. With so many moving parts, it's no wonder that common defects in plastic injection molding often intensify when process variables slip out of range.
Where Defects Are Most Likely to Appear
Certain problems tend to arise at key intersections so to speak...
-
Material Feeding:
Incorrect blends or moisture cause coloring problems, bubbles, or weak parts. -
Injection:
Most defects—like short shots, flashing, or burn marks—start here due to poor temperature or speed control. -
Cooling:
Warping, sink marks, and internal cracks usually trace back to cooling issues. -
Ejection:
Surface damage, defects in detail, or even broken parts can be blamed on a rough ejection step.
By paying close attention at every turn, you can typically spot common defects in plastic injection molding before they cost time and material. Keeping process variables dialed in is the fastest way to avoid common defects in plastic injection molding and turn out reliable parts batch after batch.

Types of Common Defects in Plastic Injection Molding
Even with robust process control, common defects in plastic injection molding still occur. These issues can impact esthetics, strength, and function. Understanding the types of defects—and why they happen—will aid in catching out of spec parts, reduce waste, and meet rigorous production demands. Here's a closer look at common defects found on most molding production floors often and what causes them.
Short Shots and Incomplete Filling
Short shots happen when the molten plastic doesn't fill the entire mold. The result? Parts that are incomplete, weak, or missing critical details. This defect stands out right away, usually as a portion of the part that never formed.
Why do short shots occur? The main reasons include:
- Low injection pressure: Not enough force to push the plastic all the way through the mold.
- Low melt temperature: Plastic cools too soon and solidifies before filling every space.
- Thin or complex part design: Narrow sections slow down flow, and sharp turns trap air.
- Clogged or undersized gates: Blockages or poor mold design strangle the flow.
Short shots always risk part integrity. Missing sections or thin spots make the product weak or unusable, especially in structural pieces or tight precision parts.
Flash Formation
Flash is a thin layer of excess plastic that oozes out of the mold, usually around the parting line or ejector pin areas. Think of it as the unwanted "fin" or extra lip that has to be trimmed after molding.
Flash usually shows up in these spots:
- Along the mold's parting line
- Around ejector pins
- Near vent holes or sliding components
Flash forms for several reasons:
- Too much injection pressure: Plastic pushes past where the mold halves meet.
- Worn or damaged molds: Gaps open up and let material escape.
- Improper mold clamping: Low clamp force leaves space for plastic to escape.
Flash isn't just a visual defect—it can impact assembly, sealing, or fit. Removing flash slows down production and wastes material.
Sink Marks and Voids
Both sink marks and voids show up because of uneven cooling or shrinking inside the part, but they look different and create different challenges. In some cases, it can be inherent to poor part design...but we won't go there just yet.
- Sink marks are small, sunken areas on the surface. (Who says sunken? I do.) These form when thick sections cool slower than thin ones, and the material inside pulls away from the surface as it shrinks.
- Voids are pockets of air or bubbles trapped inside the part, out of sight. These weaken parts from within and cause unexpected failures under stress.
Where do these show up?
- Sink marks form on flat surfaces, near thick ribs, bosses, or intersections where plastic is thickest.
- Voids turn up in larger, solid sections or wherever wall thickness isn't uniform.
Key factors that make these defects worse:
- Insufficient packing pressure: Plastic isn't pushed into shrinking spots as the part cools.
- Too rapid cooling: The outside hardens before the inside, trapping gaps and pockets.
- Poor part design: Large differences in wall thickness or sharp corners boost shrink rates.
Both defects affect surface finish and strength. Redesigning the part or tweaking the process usually solves the issue.
Burn Marks and Discoloration
Burn marks are brown, black, or dark streaks on the surface. Discoloration includes changes in color or shade, not always tied to heat alone. Both are big red flags in cosmetic parts and precision assemblies.
Main causes:
- Trapped air or gases: When air can't escape, it gets compressed and heats up, burning the plastic.
- Excessive melt temperature: Overheating the plastic or leaving it in the barrel too long burns it.
- Slow injection speed: Gives air more time to get trapped, increasing heat and the risk of burning.
These marks usually appear near the end of flow paths, at weld lines, or around sharp corners where air can't vent easily. Besides looking bad, burn marks hurt part strength. Severe burns even change how the plastic performs, which is a dealbreaker for most customers.
Weld Lines and Flow Lines
Weld lines—sometimes called knit lines—are lines or visible seams formed where two or more flows of molten plastic meet and don't completely fuse. Flow lines are streaks, lines, or patterns caused by variable flow rates or cooling speeds.
Where do they appear?
- Weld lines occur at holes, inserts, or anywhere the flow splits and rejoins.
- Flow lines show up on visible surfaces, near gates, or in regions where thickness changes suddenly.
What causes these issues?
- Low melt temperatures: Plastic cools before merging fully, weakening the bond.
- Low injection speed or pressure: Flow fronts meet slowly and don't combine as one.
- Design features: Holes or ribs force the flow to split and rejoin.
Impact on the final product:
- Weld lines aren't just cosmetic—they also weaken the part, especially under direct load or bending forces.
- Flow lines hurt appearance but can also hint at bigger issues with mold filling or process settings.
Spotting and fixing weld lines and flow lines can be the key to high-quality, reliable molding—especially in parts where looks and function matter equally. By recognizing these common defects in plastic injection molding and understanding their causes, you will stay ahead of production surprises and keep your process running smoothly.
Key Causes of Defects in Plastic Injection Molding
Behind every finished part, there's a story about what went right—or wrong—during production. Digging into the causes behind common defects in plastic injection molding helps prevent wasted time, material, and missed deadlines. The main reasons for defects usually fall into four categories: the material itself, the mold design, how the process is run, and the machines we trust. Here's how problems in each category can throw a wrench in the process.
Material Quality and Preparation Issues
The final part is only as good as the material that goes in. If there are issues with raw materials or how they're prepared, defects are almost guaranteed. Here's what can go sideways:
-
Moisture Content:
Plastics, especially hygroscopic types like nylon, soak up water from the air. If pellets aren't dried well, steam forms during injection. This leads to bubbles, splay marks, and weak spots in the molded part. -
Contamination:
Foreign particles—like dust, metal shavings, or leftover material from another job—can mix with the resin. Even a little contamination can create streaks, surface dots, or weak areas. These flaws are easy to see and often lead to rejected parts. -
Inconsistent Batches:
Suppliers may tweak resin lots without notice. Variations in color, melt flow, or additive content mean each batch behaves differently. Changing batches without adjusting machine settings can cause inconsistent molding results or surface defects that are tough to spot until you're deep into a production run.
These issues can sneak up if you don't keep tight control on incoming materials and preparation steps.
Mold Design and Maintenance Problems
The mold is the heart of the injection molding process. When its design or condition is off, parts show it right away. Common mold-related defect causes include:
-
Poor Mold Design:
Poor gate locations, thin or thick wall sections, or tight corners slow down or block plastic flow. The result can be short shots, weld lines, or excessive flashing. Odd-shaped molds may also trap air, which gets compressed and burned into the plastic. -
Worn Cavities and Cores:
Molds face serious wear over time. A worn cavity lets plastic leak out, producing flash. Rounded edges or damaged details leave parts with blurs or incomplete features. Ignoring wear turns quick fixes into expensive repairs. -
Inadequate Venting:
As plastic flows in, air needs an easy escape. If vents are small, blocked, or missing, air gets trapped. That trapped air becomes burn marks, bubbles, or flow lines. Proper venting allows air to escape and cuts down on defects.
Regular checks and smart mold design pay off.
Processing Parameter Variations
The best material and a perfect mold still need dialed-in process settings for temperature, pressure, and timing. Small drifts in these factors can open the door to many common defects in plastic injection molding. Here's why:
-
Temperature Fluctuations:
If the melt or mold isn't at the optimum temperature, plastic won't flow or cool properly. High temperatures can scorch the resin; lows cause incomplete parts or poor surface finish. -
Injection Pressure Problems:
Excessive pressure pushes plastic into gaps, making flash. Not enough means the mold doesn't fill, and you'll be left with short shots. -
Inconsistent Injection Speed:
Going too fast or slow changes how plastic fills the mold. Fast speeds might trap air, while slow speeds let plastic start to set before it fills curved details or tight spots. -
Packing and Holding Time Errors:
These settings determine how much extra material gets pushed in after the first fill. If your pack/hold settings are inadequate, you'll likely witness sink marks or voids. Too much, and the part may distort.
Even minor tweaks in settings can solve or create new problems. Tracking data and making small adjustments equals staying ahead and less major headaches.
Machine and Equipment Malfunctions
It's easy to trust that machines do the job right. But when something's off in the equipment, defects pile up quickly. Common machine-related issues include:
-
Inconsistent Clamping Force:
If the mold doesn't close tight every time, plastic escapes at the seams, leading to flash. Fluctuating force also means variable shrinkage and dimensional errors. -
Worn Injection Units:
Screws, barrels, and nozzles take a beating, especially with abrasive or filled materials. Worn screws can lead to a multitude of problems causing the melt to not be uniform. This can cause streaks, flow lines, or weak sections in the part. -
Faulty Heaters or Controls:
When heaters flicker or controls drift, temperature can spike or drop. These swings are invisible but show up as burns, uneven flow, or incomplete filling. -
Automation and Ejection Issues:
Poorly timed ejection systems can create stress cracks in parts, while robots with improperly calibrated grippers might drop or squeeze parts too hard, leaving visible damage that turns good products into costly scrap.
Regular maintenance, checks, and machine calibration go a long way. If you see sudden changes in defect types or frequency, equipment is one of the first places to look.
Staying on top of these root causes aids in ensuring quality standards are met, and unplanned downtime events become a thing of the past. Watching for material changes, maintaining molds, setting precise process parameters, and keeping machines running smooth stops common defects in plastic injection molding from impacting your production schedule. By keeping each of these major areas in check, you will deliver in spec parts—run after run.
Troubleshooting and Diagnosing Defects
Troubleshooting is part of the daily grind when working to keep common defects in plastic injection molding at bay. Catching problems early—before hundreds, thousands (or even millions in some cases) of parts roll off the press—is a skill every professional needs. Here, I'll uncover a robust process for inspecting parts, measuring flaws, and getting to the bottom of what's really causing trouble within your injection molding process.
Visual Inspection and Testing Techniques
The first step to catch common flaws in plastic injection molding is a thorough visual inspection. A careful look is essential, along with the use of proper tools to measure and record any defects found. This ensures nothing gets missed and every issue is tracked.
Ways to spot and measure defects:
-
Visual checks in bright light:
Keep the process simple. Check each part under good lighting from several angles. With the right setup, surface issues like burn marks, flash, flow lines, or sink marks stand out right away. -
Magnifiers and microscopes:
Small cracks, bubbles, or micro-voids hide in plain sight. It never hurts to grab a handheld magnifier (often referred to as a loop by most tooling professionals) or a digital microscope for close-ups, especially for transparent or thin-walled parts. -
Optical comparators and cameras:
For fine detail, it's not a bad idea to rely on optical comparators. These allow for measurement and comparative analysis of part profiles to CAD or master parts. High-res cameras record surface defects and build a library of images for traceability. -
Dimensional analysis:
Defects often show up as parts out of spec. Most injection molding quality teams use calipers, micrometers, or coordinate measuring machines (CMM) to check key features. Shrinkage, warping, or incomplete filling throws off part size and hole placement. -
Gauges and custom fixtures:
For fast checks, use go/no-go gauges or custom fixtures made for each job. Consistent fit means the process is running smooth.
When defects appear, document them—where on the part, how big, and how often. Trending data this way points to changes upstream. Good records help spot if the same problem keeps coming back, which makes finding the cause much easier.
Other helpful tests include:
-
Pull or bend tests for strength:
Look for weak areas caused by gaps or poor welds. When a part snaps too easily, check if it filled right or if the material has problems. -
Surface roughness measuring:
Scratches or inconsistent texture can point to ejection problems or a dirty mold.
When you use sight, touch, and measurement together, you can spot problems early. This helps you catch any slips in quality before they lead to missed shipments or unhappy customers.
Root Cause Analysis in Injection Molding
When a defect is spotted, the key is to fix the root cause—not treat the symptom. Structured problem-solving methods cut through guesswork and get to what's broken in the process. Using tools like 5 Whys, Fishbone Diagrams, and solid real-world logic to trace problems at their source is highly recommended.
5 Whys: Asking "Why?" Until You Get Answers
This method is simple but powerful. Don't just stop at the first answer, keep pushing—asking "why?" up to five times—until you arrive at a root cause, not just surface-level symptoms.
Example:
I see short shots on several parts.
- Why did the mold not fill?
The injection pressure was too low. - Why was the pressure low?
The machine settings changed. - Why were settings changed?
A different material was used this shift. - Why was a different material used?
Material prep team switched to a backup supply. - Why?
The regular material ran out and no new order was placed.
Fishbone (Ishikawa) Diagrams: Mapping Out the Causes
Start by sketching a diagram with the defect at the "head" and possible causes branching off like fish bones. You'll want to cover major categories such as:
- Material problems (moisture, contamination)
- Mold design or wear
- Process parameters (speed, temperature)
- Machine and tooling issues
- Operator and environment factors
This makes it easy for your team to see all the angles at once. Every "bone" becomes a spot to check, test, or rule out.
Example:
For burn marks, an example diagram would include:
- Air trapped in the mold
- Poor venting
- Overheated material
- Slow filling due to underpowered machine
- Old or degraded resin
Walking through each "bone" allows for a thorough root cause analysis versus "shotgunning" fixes.
Data Collection and Real-World Feedback
Solid troubleshooting always includes hard data. That means:
- Tracking defect frequency over time
- Logging exact process parameters when flaws appear
- Noting any material or machine changes
Operators notice changes quickly, such as when a machine isn't running properly. Their feedback, along with data analysis, helps reveal more details and can aid in catching out of spec parts before seeing a spike in scrap produced.
Connecting the Dots
Root cause analysis isn't about hunting for blame. It's about building a roadmap back from the defect to the true issue—whether it's a worn screw, a missed maintenance cycle, or the third shift running a little too hot. Combining what I see, measure, and map makes it possible to fix problems for good—not just sweep them under the rug.
Careful inspection and clear data tracking help spot most defects. This approach keeps quality high and prevents unexpected problems. By following these steps, it is possible to fix common issues in plastic injection molding and address each root cause one by one.
Strategies to Prevent Common Defects in Plastic Injection Molding
Every injection molding professional knows how much time, money, and stress defects can cause. Even the tiniest defects can derail a project and frustrate a team. The best way to get ahead of common defects in plastic injection molding is adopting a proactive approach to process control versus reactive. Below, I'll share practical strategies that are guaranteed to cut down on injection molding part defects that make you go home at night and rethink your life choices.
Optimizing Molding Parameters and Process Control
The heart of defect prevention always starts at the control panel. Fine-tuning the right process settings ensures consistent part quality run after run.
Process control commandments to live by:
- Document the optimal settings for each material, mold, and part. Keep track of a "golden run" (aka nominal process) log with details like melt temperature, injection speed, pressure, hold time, and cooling time. Thank me later.
- Set melt temperature within spec for the plastic in use. Too high, and you run the risk of seeing burn marks and brittleness in your plastic part. Too low, you will likely see short shots and poor surface finish.
- Match injection speed and pressure to the design. Thin walls need a fast fill to avoid short shots; thicker parts might need slower, steady flow to prevent voids and flow lines.
- Use consistent packing and holding pressure. This forces extra material into the mold to fill shrinking spots, stopping sink marks and voids before they start.
- Adjust cooling time and mold temperature, then check parts for warping or uneven cooling. It's better to add seconds to the cycle than watch scrap pile up from ineffective cooling.
- Monitor key process variables during each run. Keep track of real-time data for any signs of drift, alarms, or errors. Even a small slip in temperature or pressure can mean trouble.
When problems pop up, don't just throw an idea to the wall and hope it sticks. Review your process records, compare them to the golden run, and make small, calculated adjustments. Staying disciplined with process control is the fastest way to prevent most common defects in plastic injection molding before they even happen.
Regular Mold Maintenance and Inspection
A clean, well-cared-for mold makes good parts. You can either implement a planned preventative maintenance routine, or your mold will schedule its maintenance for you...at the worst time.
Key elements to include in your maintenance routine:
- Inspect molds before every run for wear, cracks, and damage. Look closely at the parting line, vents, ejector pins, and gate areas for buildup and wear.
- Clean molds often, especially after running heavily filled or high-temperature materials. Use recommended cleaners and soft brushes, never scraping or gouging any surface.
- Check and deepen vents as needed. Proper venting lets trapped air escape, which keeps burn marks and bubbles off finished parts.
- Lubricate moving parts like slides, lifters, and ejector pins. Proper lubrication prevents sticking and scratches on the finished part.
- Track mold cycles using a log or automated counter. Molds that are nearing the end of their life expectancy require more heightened awareness, so I always check them more often.
- Schedule deep cleaning and full teardown inspections at fixed intervals (not just when trouble hits). Finding a worn cavity or a cracked core early can equate to huge savings. Especially when your mold produces millions of parts per day.
If a trend starts to occur—like flash showing up in the same spot or ejector pins leaving marks—stop the run and pull the mold for a closer look. Regular inspections don't just keep molds healthy; they protect from lost hours and expensive repairs.
Material Handling and Storage Best Practices
Good parts start with clean, dry, and well-kept plastic. That sounds basic, but getting lazy here is one of the fastest ways to invite injection molding defects into the production environment and wreak havoc on your bottom line.
- Keep resins sealed and dry. Store materials in airtight bins, away from moisture and dust. For hygroscopic plastics (like ABS and nylon), even a few hours of air exposure can ruin a whole lot.
- Pre-dry materials to spec. Use a verified drying oven and check temperature and time for every lot. Underdried resin causes splay, bubbles, and weak spots.
- Label and track every batch. It's imperative to keep good records of lot numbers, supplier details, and any additives or colorants blended in. This helps trace any defect back to its source.
- Clean hoppers and feed systems between material changes. Mixing old and new resins breeds contamination problems—especially color streaks and black specs.
- Use lined gloves and dedicated tools when scooping, pouring, or mixing to block contamination from hands, floors, or other work cells.
- Inspect material for foreign particles—anything from cardboard bits to metal. Even tiny pieces lead to surface dots or streaks in later parts.
Whenever someone skips these steps, the defects pop up fast—cloudiness, streaks, voids, or random weak spots show right away. I've learned it's always faster (and cheaper) to keep materials clean and dry than to rework bad parts or trace problems back after the fact.
Staying disciplined with process control, mold maintenance, and careful material handling is sure to help you avoid the most common defects in plastic injection molding over the years. These best practices are simple to set up, easy to maintain, and they pay off every day with more uptime, less scrap, and happier customers.
Frequently Asked Questions
The most common defects include short shots (incomplete filling), flash (excess material at parting lines), sink marks (surface depressions), warping (part distortion), burn marks (dark discoloration), flow lines (wavy patterns), weld lines (visible seams), voids (internal air pockets), and splay marks (silver streaking from moisture).
To fix short shots: (1) Increase injection pressure by 10-15%, (2) Raise melt temperature by 15-25°F, (3) Increase injection speed, (4) Check for clogged gates or vents, (5) Verify adequate material in hopper, (6) Extend pack/hold time by 2-3 seconds. Start with pressure and temperature adjustments first as these are the most common causes.
Flash occurs when excess plastic escapes from the mold cavity, typically due to: (1) Excessive injection pressure forcing material past sealing surfaces, (2) Worn or damaged mold surfaces creating gaps, (3) Insufficient clamp tonnage allowing mold to separate, (4) Mold contamination preventing proper sealing, or (5) Excessive material shot size. The solution depends on the root cause—reduce pressure for overpacking, repair molds for damage, or increase clamp force for separation issues.
Prevent sink marks and voids by: (1) Increasing pack/hold pressure by 15-20%, (2) Extending pack/hold time to allow more material to flow into shrinking areas, (3) Reducing mold temperature to slow cooling, (4) Redesigning thick sections with ribs or coring, (5) Ensuring gates are located near thick sections, (6) Lowering melt temperature to reduce shrinkage. For existing designs, focus on pack pressure optimization first.
Optimal temperatures vary by material: PP (400-450°F), PE (350-450°F), ABS (420-500°F), PC (550-650°F), PA/Nylon (500-550°F). Always consult your material supplier's data sheet for specific recommendations. General rule: start at the middle of the recommended range and adjust ±15°F based on results. Too hot causes degradation and burn marks; too cold causes short shots and poor surface finish.
Eliminate burn marks by: (1) Improving mold venting—add or enlarge vents at end of fill areas, (2) Reducing injection speed to prevent air compression, (3) Lowering melt temperature if material is degrading, (4) Cleaning or replacing degraded material in barrel, (5) Reducing screw rotation speed, (6) Shortening residence time in barrel. Most burn marks are caused by trapped air getting compressed and superheating, so venting is the primary solution.
Weld lines form where two flow fronts meet and don't fully bond. Minimize them by: (1) Increasing melt temperature by 20-30°F for better flow fusion, (2) Raising injection speed and pressure, (3) Relocating gates to change flow pattern, (4) Increasing mold temperature, (5) Removing obstacles that split flow when possible, (6) Using gas-assisted injection for critical applications. Note: weld lines can't always be eliminated but can be relocated to non-critical areas through gate repositioning.
Warping results from uneven cooling and internal stresses. Causes include: (1) Uneven mold temperatures creating differential shrinkage, (2) Insufficient cooling time, (3) Over-packing creating residual stress, (4) Non-uniform wall thickness, (5) Improper gate location, (6) Ejection while too hot. Solutions: balance cooling channels, extend cooling time, reduce pack pressure, maintain uniform wall thickness, and ensure adequate cooling before ejection.
Maintenance frequency depends on production volume: (1) Daily: Visual inspection and cleaning of parting line, (2) Weekly: Check vents, ejector pins, gate areas for wear/buildup, (3) Every 10,000-50,000 shots: Deep clean and lubricate moving components, (4) Every 100,000-500,000 shots: Full teardown inspection and refurbishment. High-volume molds or those running abrasive/filled materials need more frequent maintenance. Track defect trends—increasing flash or ejection marks signal immediate maintenance needs.
Splay marks are silver or white streaks caused by moisture or gas in the material, appearing as sparkly patterns radiating from the gate. Flow lines are circular, wavy patterns showing the plastic flow path, caused by variations in cooling rate or melt viscosity. Fix splay by drying material properly and increasing melt temperature. Fix flow lines by raising mold temperature and injection speed.
Still Struggling with Injection Molding Defects?
Sometimes defects require expert diagnosis and hands-on troubleshooting. Our injection molding specialists have solved thousands of defect issues across every material and part type.
How We Can Help:
- ✅ Moldflow Analysis - Predict defects before cutting steel, identify fill patterns, weld lines, and air traps
- ✅ Process Optimization - DOE studies and scientific molding to eliminate defects permanently
- ✅ Mold Design Review - DFM analysis to prevent defects through better design
- ✅ On-Site Troubleshooting - Expert technicians diagnose and fix defects at your facility
15+ years solving injection molding defects. Managed 200+ tooling projects. Reduced scrap rates by 60-90% for clients. Let us fix your defect issues for good.
Conclusion
Spotting and fixing common defects in plastic injection molding is just one part of the puzzle to keeping your production lines running smooth and customers coming back. When parts meet quality targets, it's inevitable you will save time, reduce scrap, and boost profit with every shipment that leaves your warehouse. That is of course if you give your injection molding machine and any auxiliary equipment the TLC it needs during planned mold maintenances as well.
The top injection molding companies in the world have one thing in common. They all prioritize and value quality control, regular training, continuous improvement and investing in their resources. This type of mindset is what prepares them to handle new challenges quickly, effectively and efficiently as they arise.
Thanks for following along. I welcome your stories and questions—share your experiences or tips below to help us all improve and succeed. Check out our About Us page. There you will understand why moldminds.com was created.
On that note...
If you enjoyed this article, please like and share it on your favorite platform. Your support helps moldminds grow, which also helps promote the injection molding industry—one of the best fields in manufacturing.